Bench Testing a Starter Without a Solenoid
Dec 12th 2017
Bench Testing a Starter Without a Solenoid
Bench testing a starter is a very simple procedure, especially if you already have the starter off the vehicle. This is an off-vehicle test so you need to remove the starter from the vehicle. Before you go through the trouble of removing the starter, make sure that the battery is charged and working properly. If the battery is good, and the vehicle still won’t start you can use the following ways to determine if the starter is the problem:
1) Nothing happens when you turn the key to start the engine.
2) You turn the key and you hear one loud click and the engine still doesn’t start.
What You Will Need
- Battery Jumper Cables
- Working Battery (Take one from a working vehicle if possible. Battery must have 12.5 volts. DO NOT use a jump box)
- Vise to Hold Starter (You can have someone hold the starter if you don’t have a vise)
Be sure that while you are testing the starter, that you keep any loose clothing, jewelry, or your fingers away from the pinion gear as it’s spins.
Bench Testing

Step One: Place your starter in the vise or have someone hold it carefully.
 to the starter case itself.")
Step Two: Attach the negative (BLACK) battery cable to the to the negative terminal of the battery. The other end will need to be attached to the starter case.

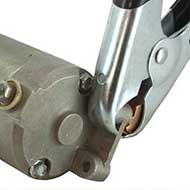
Step Three: Attach the positive (RED) battery cable to the positive terminal on the battery. Then you will need to touch the other end of the cable to the starter’s power input connector. As soon as you touch the battery cable to the input connector, the pinion gear should start to spin.
Understanding the Results
If the starter spins when you touch the positive battery cable to the input connector, then the starter is good, and there is another problem with the vehicle. If the starter fails to spin, then the starter is defective and needs to be replaced.