How to Change Oil on a Honda FourTrax ATV
Sep 21st 2018
How to Change Oil on a Honda FourTrax ATV

Honda ATVs--like their motorcycles, and power equipment--are world famous for their dependable durability and steadfast reliability. However, the key to that durability and reliability is making sure that proper maintenance is performed on a regular basis. One of the easiest and most important maintenance jobs that you, the owner, can perform yourself is the basic oil change. Oil is the lifeblood of the engine and as long as that engine is adequately filled with fresh, clean oil, it can continue to provide you with many years and miles of fun, adventure, and trouble-free service.

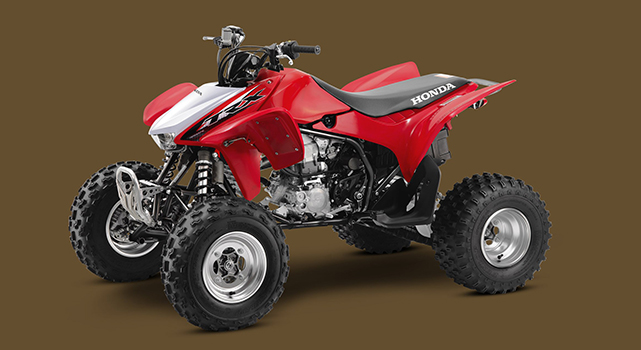
2013 Honda TRX450R FourTrax
One of Honda’s most popular ATV models is the TRX450R, based off of the best-selling FourTrax Foreman. In this quick How-To, we’ll be using the TRX450R as our subject vehicle but the actual process itself is fairly *universal for most ATVs.
* NOTE: Your ATV may be equipped with either a dry-sump or wet-sump oiling system. For dry-sump systems, the auxiliary oil tank must also be drained. This is an additional step in the procedure, but otherwise, directions are as follows.
YOU CAN’T DO THE JOB WITHOUT THESE
- oil drain pan
- shop towels
- chemical-resistant gloves
- plastic oil funnel
- socket wrench
- 8mm socket (oil filter cover)
- 12mm socket (crankcase and oil tank drain plugs)
- 14mm socket (oil tank drain plugs)
- 2 quarts Pro Honda 4-stroke synthetic engine oil (consult owner’s manual)
- cartridge-type oil filter (consult owner’s manual)
STEP 1: START ENGINE, HEAT OIL TO OPERATING TEMPERATURE
Start your engine, let it idle for 5 minutes, and then turn it off. The reason for this is because you want that engine nice and hot so that it flows easier, thus drains easier. You want to minimize any of that leftover contaminated oil before you replace it with a brand new, fresh batch.
STEP 2: DRAIN THE OLD OIL
Place your oil drain pan underneath the engine of your ATV. If your ATV’s engine utilizes a dry-sump oiling system (as in the case of the Honda TRX450R), loosen the dipstick on the oil tank to relieve internal pressure.
- CRANKCASE: Use the 12mm socket to loosen the drain plug on the crankcase. Don’t let the crush washer drop into the drain pan, or else you’ll be fishing it out of there later. Once the oil stops dripping out of the crankcase drain, reinstall the drain plug and tighten to 16 ft. lbs. of torque.
- OIL TANK: On the bottom of the auxiliary oil tank, use the 14mm socket to loosen the drain plug. Again, pay attention and don’t lose the crush washer. Once the oil stops dripping out of the tank, reinstall the drain plug. The torque specification for the oil tank drain plug is 14 ft. lbs.
STEP 3: REPLACE THE OIL FILTER
Remove the two 8mm bolts that secure the oil filter cover. These can be found at the opposite side of the engine. Keep in mind that there is still old oil in this compartment; make sure that your drain pan is still underneath the ATV. Once the bolts have been removed, remove the oil filter cover and let the excess oil drain completely. While the oil filter cover is off, you should probably inspect the o-ring gasket that seals the cover to the engine block. If you notice any visible wear or damage, replace the o-ring gasket (Discount Starter & Alternator sells Winderosa OEM-quality replacement oil seals and complete gasket kits for Honda ATVs, including the TRX450R).
- There is a spring that sits inside the oil filter chamber. This is what helps position the oil filter. If it comes loose or falls out upon removal of the old filter, simply place it back in the same spot where it was. If it hasn’t fallen out, leave it as-is.
- The oil filter is directional and must be installed and positioned facing exactly the same way as the old one. Also, the rubber seal on the oil filter needs to face outwards.
- Install the cartridge oil filter into the chamber, then line up the cover by way of the bolt holes on the cover itself and on the block. The long bolt goes towards the front of the engine, the short bolt goes towards the rear. Tighten both bolts securely.
STEP 4: REFILL
Remove the dipstick (on a dry-sump system, this will be on the oil reservoir tank). Insert funnel and fill with new oil but don’t fill all 1.9 quarts in just yet. Instead, gently pour in the first quart, remove the funnel, then reinsert the dipstick. Start the engine and let it run for about 15 to 20 seconds. While the engine is running, visually inspect your drain bolts and filter cover bolts for leaks. If leaks are detected, stop the engine immediately and retorque any and all loose bolts. If you don’t see any leaks while the engine is running, let it idle for 15 to 20 uninterrupted seconds and then shut it down. Remove the dipstick, reinsert the funnel, and pour in the remaining 3/4ths of the second quart of oil. Now, fire the engine and let it run for 3 minutes. After the 3 minutes are up, turn off the engine and check the dipstick. If the level on the dipstick reads ‘UPPER’, the oil is at the appropriate factory OEM-spec level.
Congratulations! You now know how to do ATV oil changes all by yourself!

