How to Replace a Starter Solenoid
Jun 19th 2025
How to Replace a Starter Solenoid

Your car’s engine is most vulnerable to damage during startup but the one component that suffers the greatest amount of strain is the engine starter. Think about how long you’ve owned your vehicle. Now, think about how often you drive. Every time you start your engine and go for a drive, it’s yet another flogging that the starter will have to endure. You can watch how to test your solenoid here.

All of that wear and tear will eventually catch up and the starter will give up the ghost. It can happen at 50,000 miles. It can happen at 75,000 miles. 100,000 miles, 200,000 and upward if you’re in it for the long-haul and keep your vehicle longer than 10 years. Replacing the starter is not a difficult job in itself, but brand new starter units themselves can be quite costly. Is some cases, replacing the entire starter is unavoidable but more often than not, it’s a failed starter solenoid that’s the culprit behind a dud starter. By replacing the solenoid on your starter, you can save time and money as opposed to having to purchase a brand new complete unit. Best of all, it’s a relatively simple process that anyone with limited mechanical aptitude can perform. We’ll show you how!

STEP 1: TEST THE STARTER ITSELF
With the starter removed from the vehicle, you will need to determine if the starter can be repaired or if it’s junk and a brand new one is required. Keep in mind that while many starters have the solenoid attached to the case, some vehicle makes and models have the starter and the solenoid separate. Check out our readthrough on how to bench test a starter with a solenoid and how to test a starter without a solenoid.
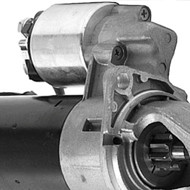
STEP 2: REMOVE THE STARTER SOLENOID RETAINING SCREWS
For starters with an attached solenoid, the solenoid is typically held in place by two Phillips-head screws. Use a Phillips-head screwdriver to remove the retaining screws. Make sure you use the right size screwdriver as to not strip the heads.
TIP: If the screws appear to be rusted in place, use a penetrating oil (such as PB B’laster) to break through any rust and corrosion. Don’t use too much force when removing the screws as to avoid damage/breakage.
STEP 3: SEPARATE THE SOLENOID FROM THE STARTER
With both retaining screws removed, grip the solenoid with one hand and slide/unscrew it away from the starter. The solenoid should easily slide out. Some starter solenoids are packed with shims and/or springs, so be careful not to let them shoot out because you will be reusing them when it comes time to install the replacement piece.
STEP 4: COMPARE THE OLD SOLENOID WITH THE NEW ONE
Physically inspect and compare the old solenoid with the brand new replacement solenoid. The reason for this is because it’s not entirely uncommon for a replacement solenoid to come with four terminals versus your original solenoid’s three terminals. If your replacement does have four terminals, don’t worry; we’ll cover this more in-depth in the last step.
STEP 5: INSTALL THE NEW STARTER SOLENOID
Insert the replacement solenoid into the starter housing; the same way how you removed the old one. You might need to use a little physical force to pop the plunger back into the housing. Keep flat and solid and never press in the solenoid at an angle or else you’ll risk severe damage to the solenoid and the starter itself.
STEP 6: REINSERT THE RETAINING SCREWS
Secure the retaining screws. Be careful not to use excessive force; just make sure it’s tight enough so that the solenoid doesn’t wobble or shake itself loose from vibration. Also, the use of thread-locking fluid on the retaining bolts is unnecessary.
STEP 7: REINSTALL THE STARTER AND CONNECT THE WIRING
This is where you’ll need to pay attention to whether or not your car uses three terminals or four terminals. If your original factory solenoid uses three terminals, connect the third wire to the terminal marked ‘S’. You won’t be needing the other one. The terminal marked ‘I’ is only for vehicles that use four wires that go into the starter solenoid.
Install your refurbished starter, reconnect the proper terminals, reconnect the battery, and attempt to start the engine. If it fires as it should, give yourself a pat on the back. You’ve just performed one of the most common auto shop jobs all by yourself and you saved valuable time and money along the way!