
How to Test a 3-Wire Permanent Magnet Trim Motor
May 21st 2018
How to Test a 3-Wire Permanent Magnet Trim Motor
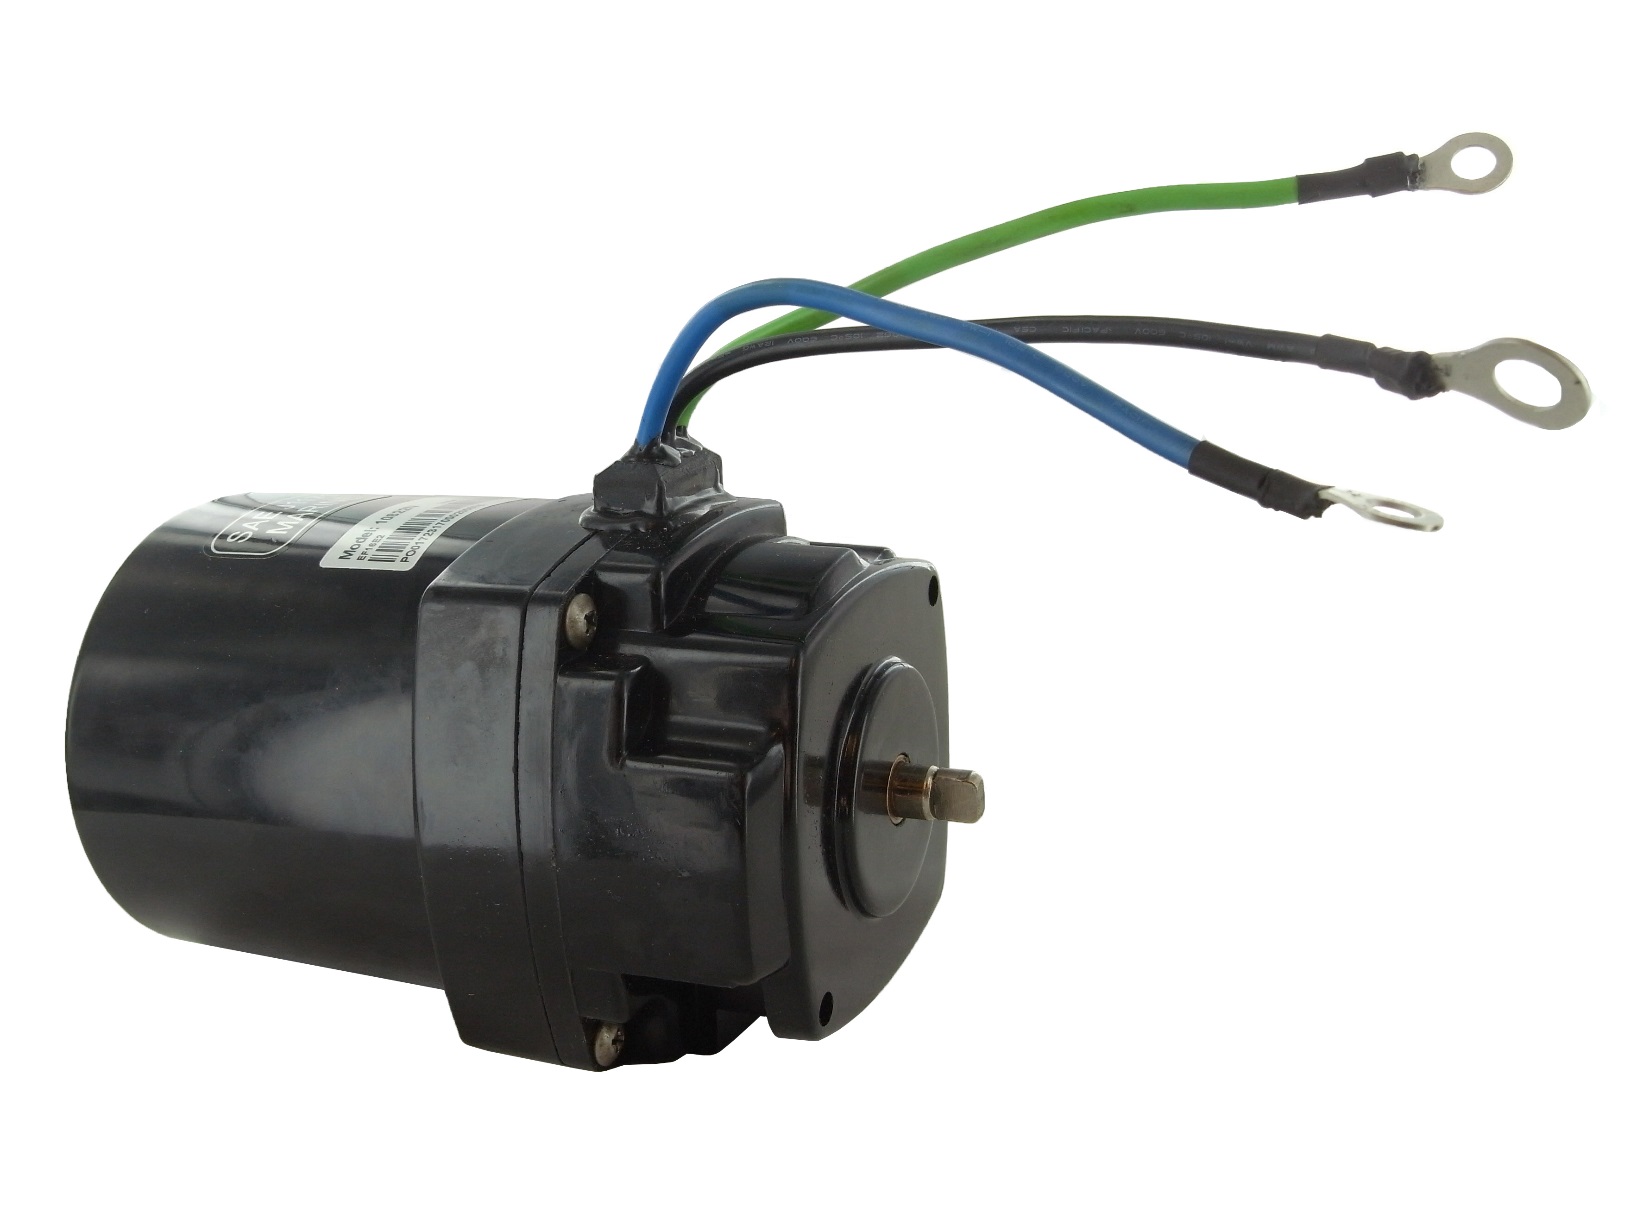
This test will work for any 12-volt, 3 wire, permanent magnet trim motor. First, use the images below to accurately identify what type of motor you have. Before you test your motor, you will need to remove it from the boat. Be sure to check out the full How To video below. 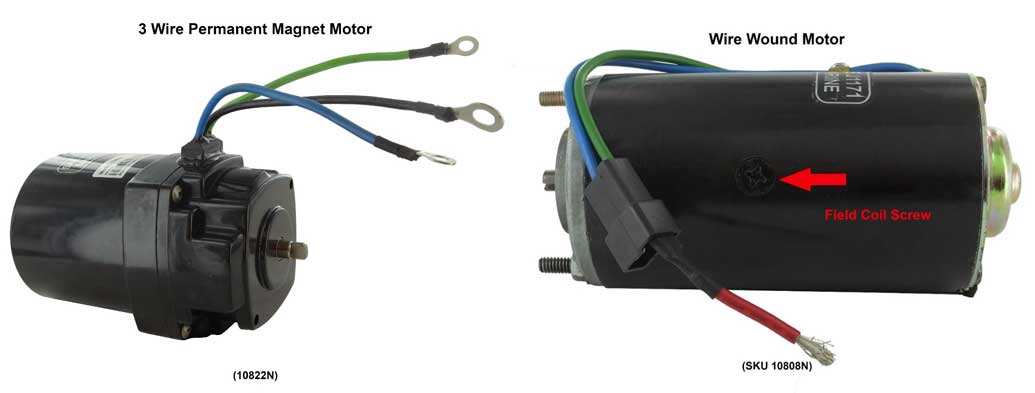
What You Will Need
- Battery Jumper Cables
- Working Battery (Take one from a working vehicle if possible. Battery must have 12.5 volts. DO NOT use a jump box)
- Vise to Hold Motor (You can have someone hold the motor if you don’t have a vise)
Bench Testing
Step One: Place your motor in the vise or have someone hold it carefully.
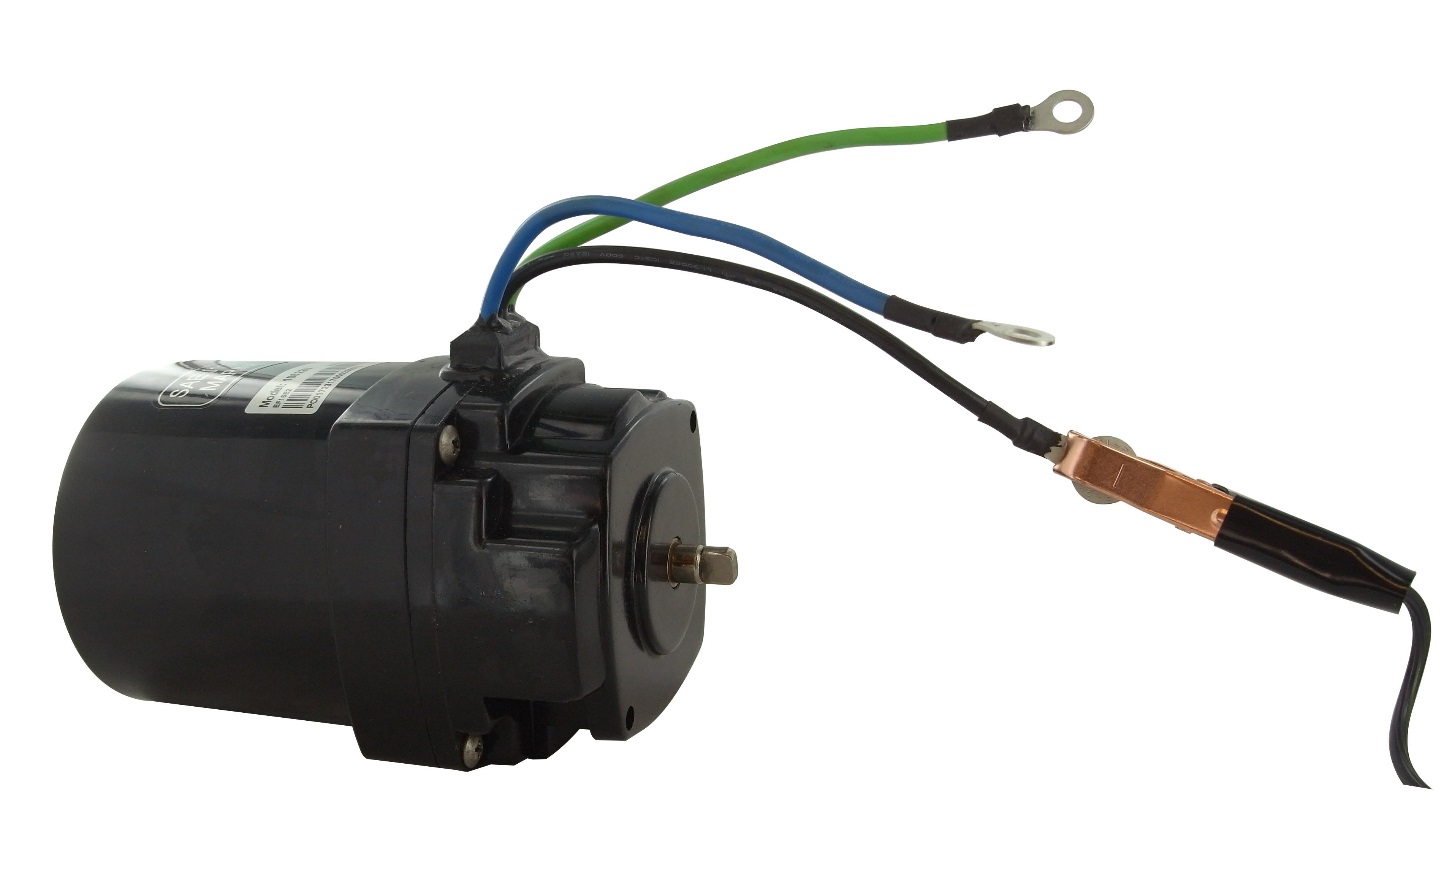
Step Two: Attach the negative (BLACK) battery cable to the to the negative terminal of the battery. The other end will need to be attached to the black wire on your motor.
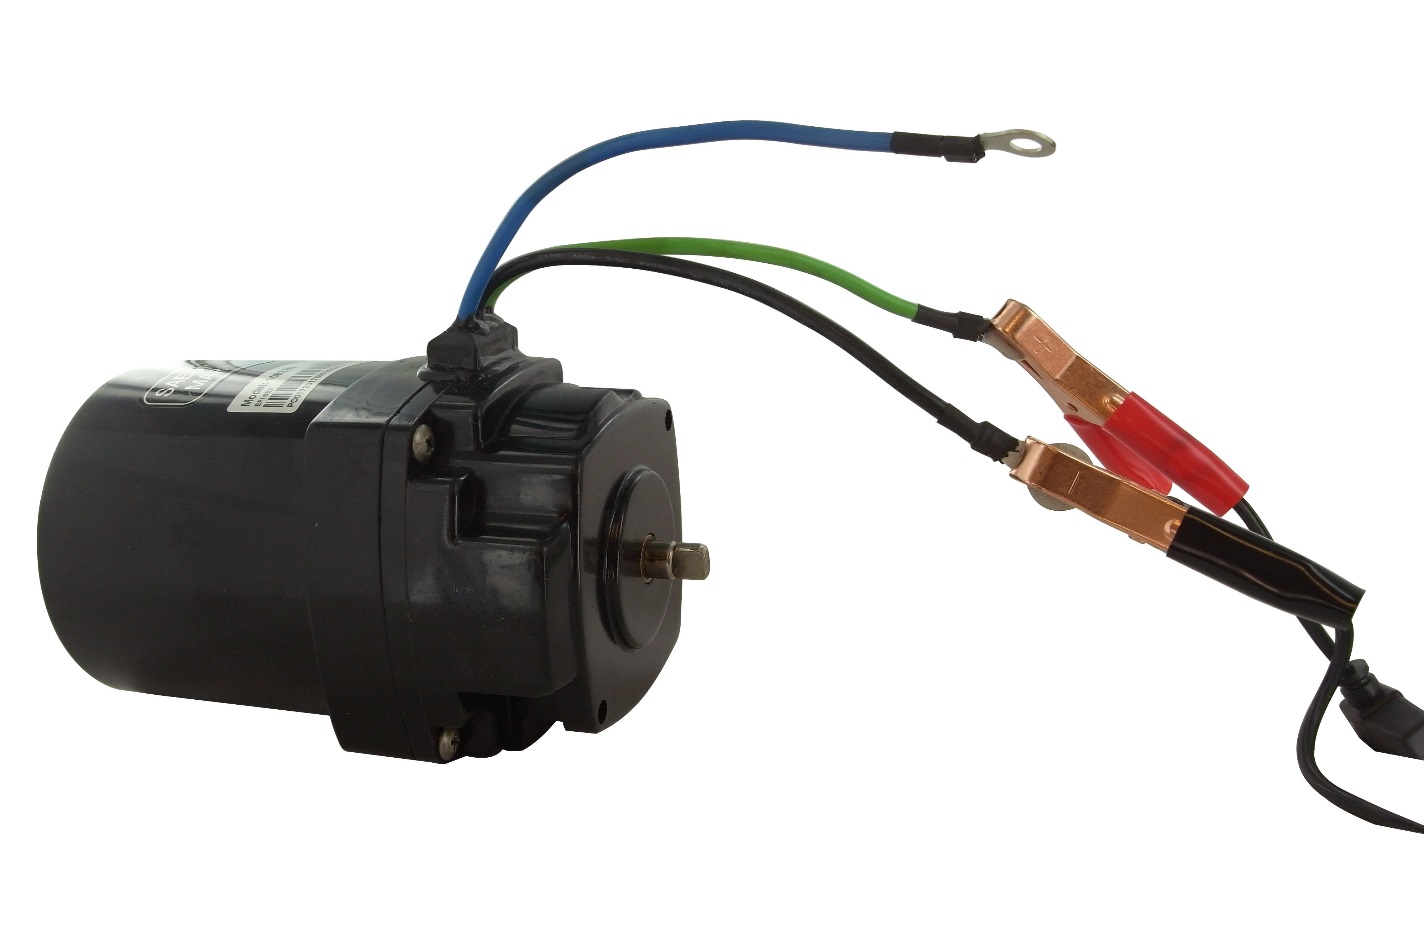
Step Three: Attach the positive (RED) battery cable to the positive terminal on the battery. Touch the other end to the green wire on the motor. As soon as you touch the battery cable to the green wire, the motor should start to spin clockwise. If the motor fails to spin, then it is defective and needs to be replaced.
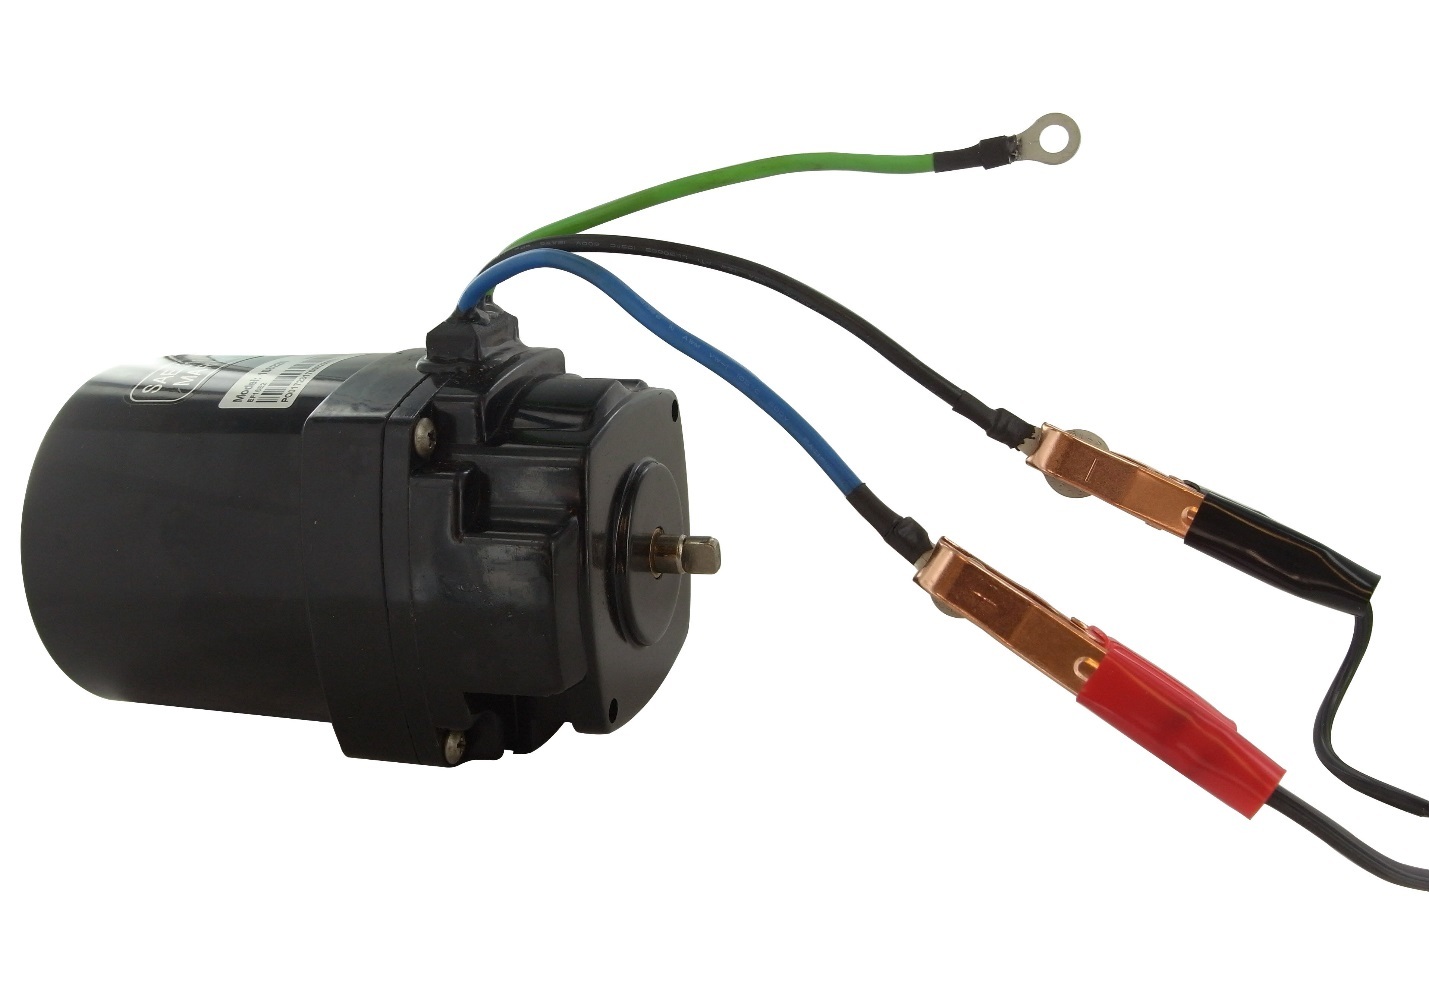
Step Four: Now touch the positive (RED) battery cable to the blue wire on the motor. As soon as you touch the blue wire, the motor should start to spin counterclockwise. If the motor fails to spin, then it is most likely defective and will need to be replaced.