Why Won’t My Car Start
Jun 20th 2019
Why Won’t My Car Start
5 Easy Solutions to 5 Common Problems
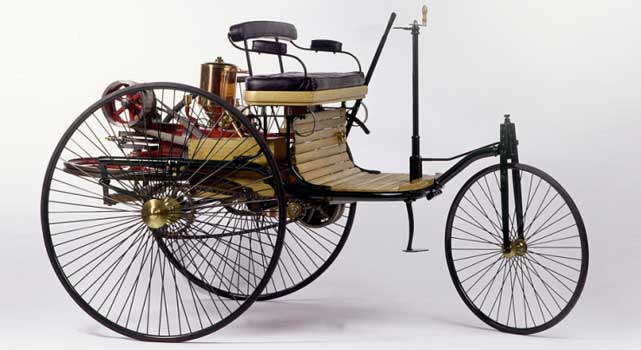
Cars have come a long way since Karl Benz introduced the first true automobile in 1886. Today’s modern vehicles are practically supercomputers on wheels with advanced electronic control systems managing everything from engine timing and ignition control to transmission behavior, braking and stability, and steering and handling. Automotive technology has even progressed to the point where autonomous vehicle control has finally become a reality and is no longer just a Science Fiction concept. Not to mention that car prices are also astronomically higher than they have ever been before and that’s in response to the rapidly-evolving landscape of automotive technology and engineering development. Cars are the second largest investment second only to purchasing a house, which makes it that much more maddening and frustrating when these scientific marvels seemingly decide to misbehave and not function as intended.
One such anomaly that has plagued the automobile since birth is the random no-start. Despite what Internet forums and social media comment sections would lead you to believe, it is a phenomenon that occurs regardless of vehicle make, model, age, and condition. Unprejudiced and impartial, like death itself, vehicle no-starts can happen in a shiny, new, top-of-the-line halo model fresh off the showroom floor or a 40-year old beater that’s been relegated to live outside like a junkyard dog. Also like death itself, it’s something that all of us drivers have and will experience again at one point or another in our lifetimes but while we can’t deny our mortality and hide from the Reaper forever, we can help our cars cheat death and overcome no-starts in relatively simple ways.
No-starts and difficulty starting are not always symptoms of a major mechanical fault that would necessitate and expensive trip to the shop. Let’s take a look at 5 reasons why cars fail to start and 5 easy fixes that don’t require an education in automotive repair or an advanced degree in computer science.
#1: DEAD BATTERY
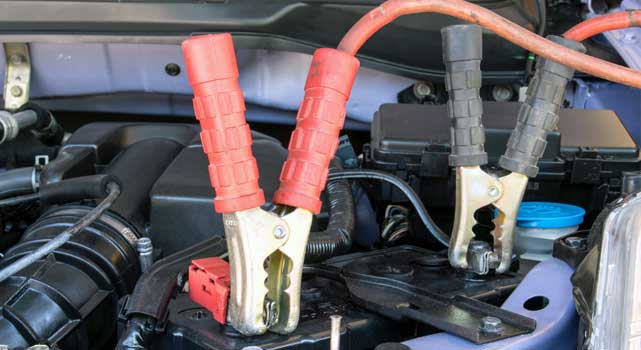
Whether you’re a do-it-yourselfer or if you prefer to take your car, truck, or SUV to a trusted mechanic, regularly scheduled maintenance is absolutely paramount to ensure the livelihood of your vehicle. We all know how important it is to keep up on oil changes, coolant flushes, brakes and brake fluid changes, transmission (and, if equipped, differential) fluid changes, filter changes, lighting and wiper replacement, and hose and wire inspection. What often gets overlooked is the battery. That’s in part due to the regular availability and widespread usage of sealed lead-acid batteries that require little or no maintenance; these types of batteries do not need manual water level adjustment therefore, we lose that constant reminder to periodically check our batteries. Alternatively, say you’re meticulous in keeping up with vehicle maintenance but there’s that one time where you forgot to turn off the headlights or the interior dome light. If your vehicle does not have battery run-down protection, that lapse in judgment could very well result in a particularly frustrating morning when you go to start the car and you hear that dreaded click with no engine rumble behind it. Sorry, but the battery has called it quits for good and it’s time to either jump start the car or buy a new battery (typically, both).
To prevent getting to this point, we should make it a point to do some preventative maintenance and inspection. There are three simple ways to check your battery’s condition. The first calls for very little effort on your part, though the caveat here is that it’s not entirely accurate. This involves your in-dash voltmeter (if equipped). If your vehicle is equipped with a voltmeter in the instrument cluster, you should see a reading of 12.6 volts or above when the vehicle is running. A reading that’s significantly lower than 12.6 is a sign that something bad is about to happen. Of course, this will be impossible to perform if your car absolutely refuses to turn over, so this is something that you should keep an eye on and make note of during normal operating conditions.
Another not-so-accurate but more-accurate-than-the-in-dash-voltmeter method to check your battery is to try and start the car, turn on your headlamps, and rev the engine (Keep at 2,000 RPM maximum to avoid cold-start damage. Or, if you can, let it run to operating temperature before you attempt.). Dim lights mean that they are being powered only by the battery and that the alternator is producing little or zero charge. If the lights get brighter as the engine revs faster, the alternator is producing current but not enough to keep the battery at a proper charge. If the lights do not change brightness or intensity when the engine is revved, the battery and the electrical system are functioning normally.
TIP: This test is also useful when testing your alternator!
The third and most-trusted way to check a car battery is through a multimeter. Multimeters can be had for as little as $9 or $10 or as expensive as close to a $1,000. Don’t worry. You won’t need an industrial-grade professional multimeter from the latter category; a basic one will suffice. To test the battery with a multimeter, set the center dial to 20 volts, touch the ( RED) probe to the positive (+) terminal and the BLACK probe to the negative (-). A reading of 12.6 volts means that your battery is in good working order. 12.2 volts means that your battery is at 50% charge and lower than 12 means that the battery is fully discharged. Be sure to pay attention when using the probes; a reading of -12.6 volts means that you’ve got the probes in the wrong direction.
THE FIX
If you have a battery charger, you can attempt to *charge the battery yourself but this is an especially time-exhaustive process and one that might not be all that practical if you yourself are in a hurry (example: late for work). If you have nowhere to be, by all means, try the battery charger. The standard fix for a dead battery is the *jump start. If you’ve never jump started a car before, the procedure is quite simple but extreme caution needs to be exercised as a car battery can carry enough energy to cause serious injury and death. This requires the aid of another vehicle and if you’re out in the middle of nowhere with no neighbors and/or the likelihood of a Good Samaritan coming assist you in your time of need is little to none, better call the tow truck and make sure you have some spare cash at your disposal.
To jump start a car, position the working vehicle close to your own so that both of your battery points are within close range. Place both vehicles in Park/Neutral and turn off the ignition on both. With a set of jumper cables, attach one ( RED) clip onto the positive (+) terminal onto your battery and the other (RED) clip onto the positive (+) terminal of the working vehicle’s battery. Attach one BLACK clip to the negative (-) terminal of the working vehicle’s battery and the other BLACK clip onto an unpainted metal surface on your car that is situated away from the your battery such as a hood strut or an engine mount is suitable (This is for grounding.). Start the working vehicle and let it idle for 5 to 10 minutes. Attempt to start your own car once the 5 or 10 minutes have passed. If your car manages to crank and turn over, thank the Good Samaritan for the help and drive for 15 minutes in order to recharge your battery. If the car still does not start, it’s a good sign that your battery has ventured to the great beyond.
TIP: Most cars have their batteries located under the hood. Some have trunk-mounted batteries (for various reasons including weight distribution, space limitations, etc.) and some, such as the Buick LeSabre, have them located underneath the rear seat. Certain Chrysler cars (specifically, the Chrysler New Yorker/LHS/Concorde/300M, Dodge Intrepid, and Eagle Vision) have their batteries located behind either the front right or front left wheel, hence requiring removal of the appropriate wheel in order to access the battery. Yes, the engineers during the Lee Iacocca days at Chrysler were quite creative, weren’t they?
*Be careful when attempting to charge or jump an AGM or gel-type battery. NEVER EVER USE A CONVENTIONAL BATTERY CHARGER ON AN AGM/GEL BATTERY unless it has selectable charging settings for flooded, AGM, and gel-type. Also, some AGM and gel-type batteries are resistant to jump starting. While it is possible that a car equipped with one can still be jump started, the battery may not charge on the alternator and will only die again once the engine and ignition have been shut down. For full-electric or electric hybrid vehicles, jump starts may not be possible and any attempts to do so can result in catastrophic damage.
#2: BAD ALTERNATOR
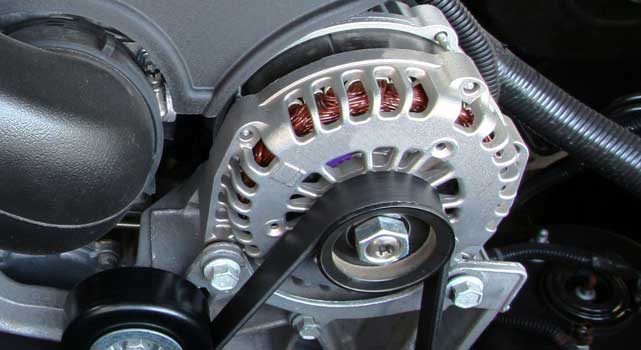
Do you remember how the car was behaving on the day before it felt like not cooperating with you? Did you hear sharp clicking noises from inside the dashboard and under the hood? Was the idle getting rough? Did the headlights seem dim or not as vibrant as to what you’re used to? Did the gauge cluster start acting as though it were possessed by the same malevolent spirit that haunted Linda Blair in ‘The Exorcist’? Smell anything strange, like a faint hint of burnt metal or electrical ozone odor? If any or all of these happened before the car began its ignition strike, there’s a high probability that the alternator has joined the recently deceased. If you’ve had any modifications done to your vehicle, such as for engine or in-car audio performance, your original stock alternator and electrical system may no longer be adequate to handle the increased power demands.
To check to see if your alternator is on the fritz, refer back to our earlier blog post: How to Check an Alternator.
THE FIX
Swapping out an alternator is not an entirely painstaking and technically-involved job. It does, however, depend on the powertrain layout and the location of the alternator itself. To remove the alternator, start by first disconnecting the negative (-) terminal from off of the battery. You may want to take this time to examine the alternator serpentine belt and pulley. Replace any dry-rotted, worn, cracked, or frayed belts with a brand new belt that meets OEM specifications. Loosen the serpentine belt by locating the belt tensioner. This is a spring-loaded, self-adjusting roller tensioner, so use caution to prevent it from snapping on your fingers. With the tensioner loosened, dislodge the belt and slip it off the alternator pulley and other engine component pulleys (Be sure to pay attention to the routing diagram listed either on a decal under the hood or in your owner’s manual). Disconnect the wiring harnesses and plugs that attach to the alternator. Pay attention to what wire goes where; you may find marking these with colored electrical tape can help you remember. Loosen the alternator. Some alternators are held in place with a bracket and a transverse bolt. This bolt will need to be removed and the alternator itself slid into opposite position using a pry bar. Install your new alternator, reconnect the wiring harnesses, and reroute your belt(s) according to the manufacturer’s diagram underhood decal or the owner’s manual. Check the belt tension. It should not exceed 0.5 inches (Too loose or too tight will negatively affect the alternator’s functioning order.). Reconnect your negative (-) battery terminal and start the engine. After a few days, recheck the belt tension and adjust accordingly.
#3: BAD STARTER
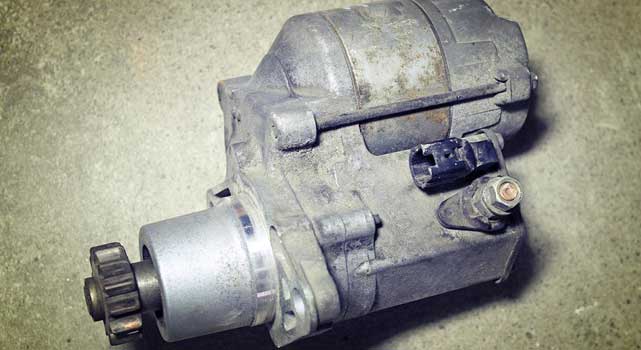
The term ‘cranking the engine’ refers to a time when people had to physically hand-crank the engine from outside of the vehicle. The electric starter was first invented as a convenience luxury feature that saved people (and their soft, precious hands) from having to perform this task manually. A starter contains a small electric motor (solenoid) that provides all the twist and torque to turn the crankshaft during ignition. It’s subjected to a lot of abuse, when you really think about it. Electrical currents, extreme heat absorption from the engine, outside environmental conditions, as well as your own personal driving habits all play a part in threatening the lifespan of a starter motor. Much like the bad alternator situation already mentioned, a bad starter or starter solenoid will also produce the dreaded click upon attempting startup but instead of the wheezing of an underpowered starter trying to twist the crankshaft to life, a dead starter won’t even move at all (it is either seized internally or it is not receiving power to turn the crank).
The thing that makes dead starters and dead alternators so frustrating is that their symptoms often mimic those of severe malfunction. Luckily, if it is indeed discovered that a broken starter is the cause of your no-start predicament, it is nowhere near as complicated (or as expensive) to fix as, say, a damaged engine or blown transmission.
THE FIX
To check to see if your car’s engine starter is a candidate for replacement, you’ll need to find out which kind of starter it is: with bendix or without. You’ll also need to physically locate the starter before you test. Most of the time, the starter can be found near the engine’s underside. Sometimes, the starter is seated in unconventional underhood locations such as on the transmission bellhousing on GM’s LS4 V8-powered front-wheel drive cars (Pontiac Grand Prix GXP, Chevrolet Monte Carlo SS and Impala SS, and Buick LaCrosse/Allure Super) built between 2005 and 2009. In some extreme circumstances, the starter can be found hiding underneath the intake manifold, inside the engine valley, between the cylinder banks (as in the case for all Cadillac Northstar engines and Northstar-derived engines in some Oldsmobile, Pontiac, and Buick models and the BMW S65 V8 engine used in the E90/92/93 M3). If you feel uncertain about attempting to perform this job yourself and the complexity involved with having such a unique configuration, consult a professional mechanic.
Refer to our earlier posts about testing starters: Basic Guide to Bench Testing a Starter, Bench Testing A Single Post Starter With Bendix (No Solenoid), and Bench Testing a Starter Without a Solenoid.
Learn how to replace a starter/starter solenoid: How to Replace a Starter Solenoid.
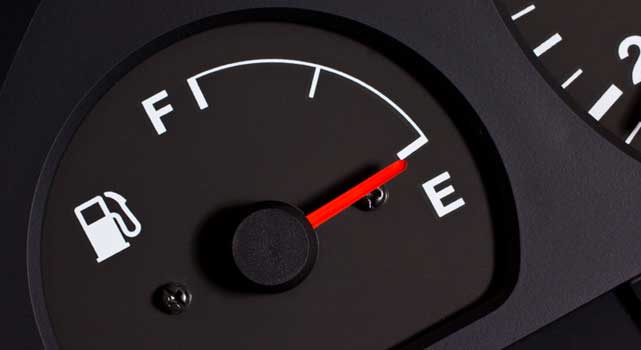
#4: OUT OF FUEL, STALE/CONTAMINATED FUEL, FUEL STARVATION
This one should go without saying, but running out of fuel happens to more motorists than you can imagine. Blame laziness, blame absent-mindedness, or even blame people’s cheapness in trying to get every last mile out of a tank of fuel (which is not only bad for the engine and fuel system, it is also self-defeating in that you’ll be paying more at the pump to fill up a tank that has depleted all of its fuel reserves as opposed to a tank that is half or a quarter full). People do forget that gasoline-fueled engines need gasoline in order to operate.
Now, not every car has a fully-comprehensive instrument cluster with separate detailed readouts for engine revolutions, hourometers, oil temperature, oil pressure, transmission temperature, boost (if equipped with a forced-induction engine), vacuum, etc. What they all have is a fuel level gauge. It would be wise to pay attention to this gauge.
TIP: Try not to let the level drop below a quarter of a tank. As a fuel tank empties, the unavoidable sediment and debris at the bottom of your tank can get sucked up into the fuel lines and cause a clog in your fuel pump, fuel filter, and the fuel lines themselves. Also, liquid fuel acts as both a lubricant and as a coolant for the fuel pump. Running a dry tank will deprive the pump from proper lubrication and cooling and eventually cause it to seize. Remember that extreme heat and extreme cold from Summer and Winter respectively can cause pressure fluctuations inside your fuel tank. It’s best to keep these tanks full or as close to full as possible if you plan to store your machine away during for season.
Stale and/or contaminated fuel is when fuel has been allowed to sit stagnant for a long amount of time. Most stations use Ethanol as a fuel additive and Ethanol has hydrophilic properties, meaning, that it sucks the moisture out of the atmosphere and directs it towards itself. Because water and fuel (gasoline being oil-based) don’t mix, water contamination can cause rough starts, no-starts, and in the worst case scenario, even damage the engine if the contamination is excessive. If storing extra gasoline, try not to store them outside in vented canisters. Keep any extra spare fuel in sealed containers to reduce oxygen infiltration. In cold weather or during the Winter season, use Dry gas or a fuel stabilizer to prevent freezing and contamination. This also applies to gasoline-powered vehicles and machines that are stored outside for extended periods of time between uses.
TIP: Storing weekend cruisers, motorcycles, ATVs and/or other recreational powersports vehicles and gas-powered equipment inside a shed or garage lessens the impact from environmental exposure.
Another source of fuel contamination can be in the pumps themselves. Yes, gasoline is expensive and it’s going to be on a continuous upward climb as long as we are dependent on foreign oil. Saving money at the pump is good but sometimes, frugality can cause rather expensive repairs. Some independent chains are not routinely serviced as their name-brand counterparts. This means tanks can sit underground for many, many years without maintenance and in that time, can be contaminated with all sorts of sediment, dirt, and water infiltration. A disreputable station can also fill their storage tanks with the cheapest mixture of regular fuel and have them all routed to pumps marked for regular, mid-range, and premium. Not only is this unethical, it can also be detrimental to your engine’s performance and long-term life. It is important to fuel your engine within the proper octane rating as stated by the manufacturer. If your manufacturer states that your engine can run on regular, run on regular. If the manufacturer states that premium grade fuel is needed, run on premium. An engine that’s designed to run on regular can run on premium, but the engine’s control module will readjust timing and spark curve and negate any performance enhancement that a higher octane fuel could potentially produce. Conversely, using low octane fuel in an engine that is designed to run only on premium can result in pinging, knocking, detonation--all of which are life-threatening to an engine. Some high-performance engines incorporate special modules that are programmed with multiple fuel maps so that they can run safely on either regular or premium. The cost of using lower octane fuel in these engines is noticeable lag and decreased engine performance as the computer scales back timing and ignition to prevent low octane-related damage.
Lastly, fuel starvation--by way of a clogged fuel filter, clogged or broken fuel pump, or bad fuel lines--can contribute to a no-start. Internal combustion occurs when oxygen and fuel are mixed together and that mixture is ignited VIA a spark inside the engine. If it is known that your electrical system is operating without flaw, fuel starvation can be the root cause. Be sure to check for any signs of fuel leakage (seepage, puddles, a strong scent of gasoline near the vehicle). Fuel spillage is often a sign of leaking lines or a filter that has ruptured. If a major leak has been discovered, it is best to not attempt to start the engine without first addressing the leak.
THE FIX
Changing out a fuel pump, fuel filter, and/or fuel lines can either be simple of extremely difficult, depending on the vehicle’s design. All of today’s modern petrol-fueled cars, trucks, and SUVs incorporate a pressurized fuel injection system for fuel delivery. While many still use basic port injection, some use gasoline direct injection (GDI) which calls for the use of a high-pressure pump, while others (such as in high-performance applications) will have a hybrid system of both GDI and port fuel injection. GDI systems are highly advanced and are controlled by a myriad of electronic modules and relays to the car’s computer. If you lack experience in working on these systems, do not attempt to perform any maintenance service yourself and take your vehicle to a qualified mechanic. On older vehicles with basic fuel injection, the fuel pump and filters can be found either in separate locations or combined together in a single unit. Fuel pumps with integrated filters are often located in the tank and sometimes require the tank itself to be emptied and dropped in order to physically reach the pump. If the tank needs to be dropped, this would be a good opportunity to dispose of the fuel and thoroughly clean out the sediment particles and debris that has settled at the bottom. If your car or truck uses an external filter, such as the 2002 Ford Explorer, replacement is easy and can be performed in little time. To change the filter, let the vehicle sit and cool (if recently driven). The engine block should be cool to the touch. Disconnect the battery. Remove the fuel cap to depressurize the system and then find the Schrader valve (the same kind of valve that’s on a tire). Depress the inner valve pin of the Schrader valve until no more fuel and air vents (Be sure to wear eye protection. You DO NOT want this stuff spraying in your face!). Locate the fuel filter, which is normally under the vehicle and near the fuel tank. Remove the safety clamps, remove the fuel lines off of the filter, swap the filter, and reinstall the lines and safety clips. On an older carbureted vehicle, fuel filters are often held in place with hose clamps attached to the rubber fuel lines. Pinch off both ends of the fuel lines with pinch clamps, loosen the hose clamps, and remove the old filter. Reconnect the battery.
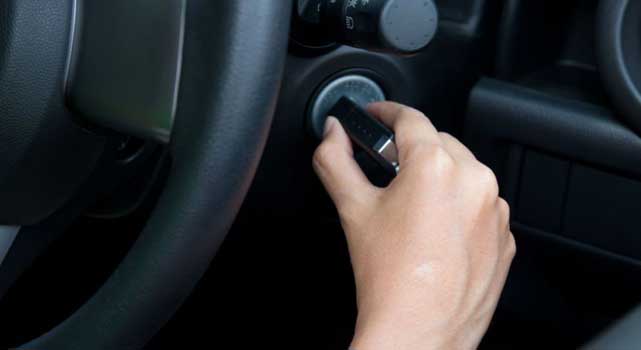
#5: IGNITION SWITCH/SECURITY LOCKOUT
If you’ve been shopping around for a new car lately, you might have noticed that many of them come equipped with keyless ignition or push-button start as a standard feature. While they’re not mandated by law ( not yet, at least), they have become so much more commonplace now than they were about a decade ago, when they were usually found as convenience features in high-end luxury vehicles. This was in response to the Toyota sudden unintended acceleration fiasco in the mid to late 2000s and the GM ignition switch brouhaha that led to nearly 30 million recalled cars across the globe with dates of manufacture as early as 1996.
For cars with the traditional key and ignition switch lock cylinder, age and use can eventually take its toll and wear out these components. To replace an ignition switch is not inherently difficult but, like the aforementioned fuel pump and other car parts, this all depends on the vehicle’s design. Your ignition switch may be dash-mounted, integrated into the steering column, or even stuck inside the center console as is with a number of Saab models. Another keynote is that most mainstream vehicles built from the early 1990s (some even as early as 1986, like the 1986 C4 Chevrolet Corvette) are equipped with a type of electronic **anti-theft deterrent. Attempting to manipulate the ignition switch can result in accidentally tripping the anti-theft system, thus rendering the vehicle inoperable until it can be reset.
THE FIX
NOTE: The following instructions refer to vehicles that use a steering column-mounted ignition key switch. For makes and models with ignition switches that are mounted in the dashboard or elsewhere, consult a repair manual for a detailed walkthrough on how to disassemble your interior trim pieces. The rest of the steps should be comparatively similar.
Disconnect the battery. Next, begin to strip the plastic moulding off of your steering column. Your car’s interior may have bolts that are used to fasten the plastic bits or they may snap into place. Use caution when manually manipulating these plastic parts as UV exposure from sunlight can turn plastic brittle to the point where even a light amount of force can warp, crack, or otherwise physically damage said piece of plastic. After you have removed the plastic trim surrounding the steering column, you may be able to remove the steering wheel. Some vehicles have their ignition switches in a position where steering wheel removal is not needed but if yours happens to require it or, if you feel that removal of the steering wheel will grant you more working space, you can remove the wheel but be careful of the airbag sensor and wiring (driver’s side airbags became government mandated equipment on all vehicles produced after September 1, 1998). Now that you have access to the ignition module, remove the clips on the ignition module cover by pressing the releases on each side (If it is difficult to remove by hand, a small flat head screwdriver can help). Slide the cover out and over the ignition module. Insert your ignition key into the ignition lock and set from LOCK/OFF to ACCESSORY. Do not turn into the ON/RUN position. This is to unlock the cylinder. With the cylinder unlocked, you will need to remove your key. Press the release pin inside the hole on the ignition module with either a small screwdriver or a paperclip (similar to forcing a slot-loading media drive to eject the disk). Now, the ignition switch will be able to slide out. If the switch giving you some resistance due to age and the accumulation of dust and debris over the years, spray a little penetrating oil or silicone lubricant to help loosen it.
NOTE: If you wish to keep your ignition keys, you will have to take your faulty ignition switch in for repair. Some car dealerships can and will rebuild ignition switches but this option is not always available. An ignition switch might be too complicated, too old, or too damaged where refurbishment is a viable option. Plus, it may prove to be even more costly than to replace with a brand new unit. The only practical benefit is not having to have new keys cut and programmed (if equipped with a theft-deterrent resistor).
Purchase a brand new ignition switch if your original unit is unsalvageable (you will need your vehicle make, model, VIN, as well as year of manufacture). On the brand new replacement switch, depress the release pin and insert into its mounting point in the steering column. Be sure to accurately line up the grooves on the switch cylinder to the indents inside the mounting point. Insert and press until you hear the release pin click into place. You may need to push with a little physical force to ensure a proper seating. Reconnect your battery and test the new switch. Test the LOCK/OFF and ACCESSORY positions first before attempting to turn the key into the ON/RUN position. All key switch positions should now function normally. If they do not, you may need to remove and reinstall the new switch because it might not be seated correctly. Once you have successfully tested the new ignition switch, disconnect the battery again and reinstall the plastic trim bits onto your steering column in the opposite order that was performed during removal. Just as you did in removing the pieces, use caution to prevent damage to the plastic during reassembly. Reconnect the battery.
TIP: Don't overload your car key chain with trinkets and other useless decorative tat. All that junk hanging off of a key chain can add weight which can either damage the ignition cylinder or cause it to suddenly shift positions, such as in the LOCK/OFF state. This is what was partially to blame for the GM ignition switch recall. It's good practice to keep your car keys separate and on as minimal of a key chain as possible.
**Early resistor keys were prone to wear over time, such as GM's Vehicle Anti-Theft System (VATS). These keys had a visible chunk of black plastic in the key blade where the resistor (pellet) sat. If one of the pellet wore out, the theft-deterrent system would not register they key and lock up the ignition as if a theft attempt had occurred. The resistor keys began to be phased out in 1997 to a more acceptable method of hiding a transponder chip inside the key head. This is how most other automakers incorporated their own anti-theft lockout systems.
MORE AGGRAVATION
No-starts and ignition problems are often caused by the 5 culprits listed above but in addition to these anomalies, some vehicles have shown to have make/model-specific gremlins that can certainly ruin a day. For example, certain Volkswagen models have their ignitions integrated with the brake light switch and, as a safety feature, damage to the brake light switch (sometimes, even a burned out brake light bulb) will prevent the ignition from operating until it is fixed. In GM vehicles with Active Fuel Management (AFM)-enabled engines, there is an oil pressure switch that helps regulate the AFM system. If this switch is damaged, there is an automatic power shutoff that will kill the ignition. For some reason, it is also set to automatically lock your key inside the ignition cylinder but the key can be released by manually depressing the lock pin in the steering column (it’s usually concealed underneath a rubber membrane).
On a wider scope, modern cars are managed by a network of computer control systems, sensors, and modules that can fail without warning. Some of these systems will disable the ignition to prevent damage to the vehicle and/or as a driver safety feature to disallow operation of a potentially unsafe machine. Most of the time, environmental damage and our driving habits are the biggest contributors to failing sensors. While it’s difficult, if not impossible, to precisely predict when a sensor, module, or circuit is going to fail, you can do your part to try and preserve these systems by adhering to your regularly scheduled maintenance and paying attention to your driving habits and environment. If you live in a 4-season part of the country, you will want to wash your vehicle after every snowfall once the snow and ice-melting chemicals have dissipated. Some parts of the country use a toxic and caustic concoction of ice-melt that can and will erode rubber, plastic, and even metal. Allowing these materials to cake up and form on the underside of your vehicle will eventually cause major damage and quite often, the first things to go are the sensitive wires, cables, sensors, and electronic components. If you’re a moderately-aggressive driver, you may want to reconsider your driving habits as you, yourself, may be to blame for damage to your car’s engine and drivetrain. Modern engines are stuck full of cam and crank position sensors, pressure sensors and switches, and other relays that, while allowing for greater potential in performance and efficiency, are not intended to last forever and can have their usefulness drastically cut short from abuse. Be mindful of your driving habits, be mindful of your environment, and make sure you maintain and service your vehicle according to a set schedule. In all the time that has passed since Karl Benz’s first car, these three important guidelines still stand today and will most likely stand for many more years to come.

